

.safetensors file lands in models/loras/, and the LoRA loader node picks it up so you can generate with it straight away.
Pick a model
Peaks are
torch.cuda.max_memory_allocated over 12 steps at rank 16 and batch 1, so leave headroom for the CUDA context. The 16GB figures for Z-Image, Krea 2 and MiniMax H3 were measured on a Tesla T4; the other small-card entries are interpolated from L40S runs. Training directly on a step-distilled checkpoint breaks the distillation down, so each model either trains on an undistilled base or, for Z-Image, works around it with a training adapter or De-Turbo mode.
Install
If you installed with--extra all, the trainer is ready. Otherwise add the training extra:
The training graph
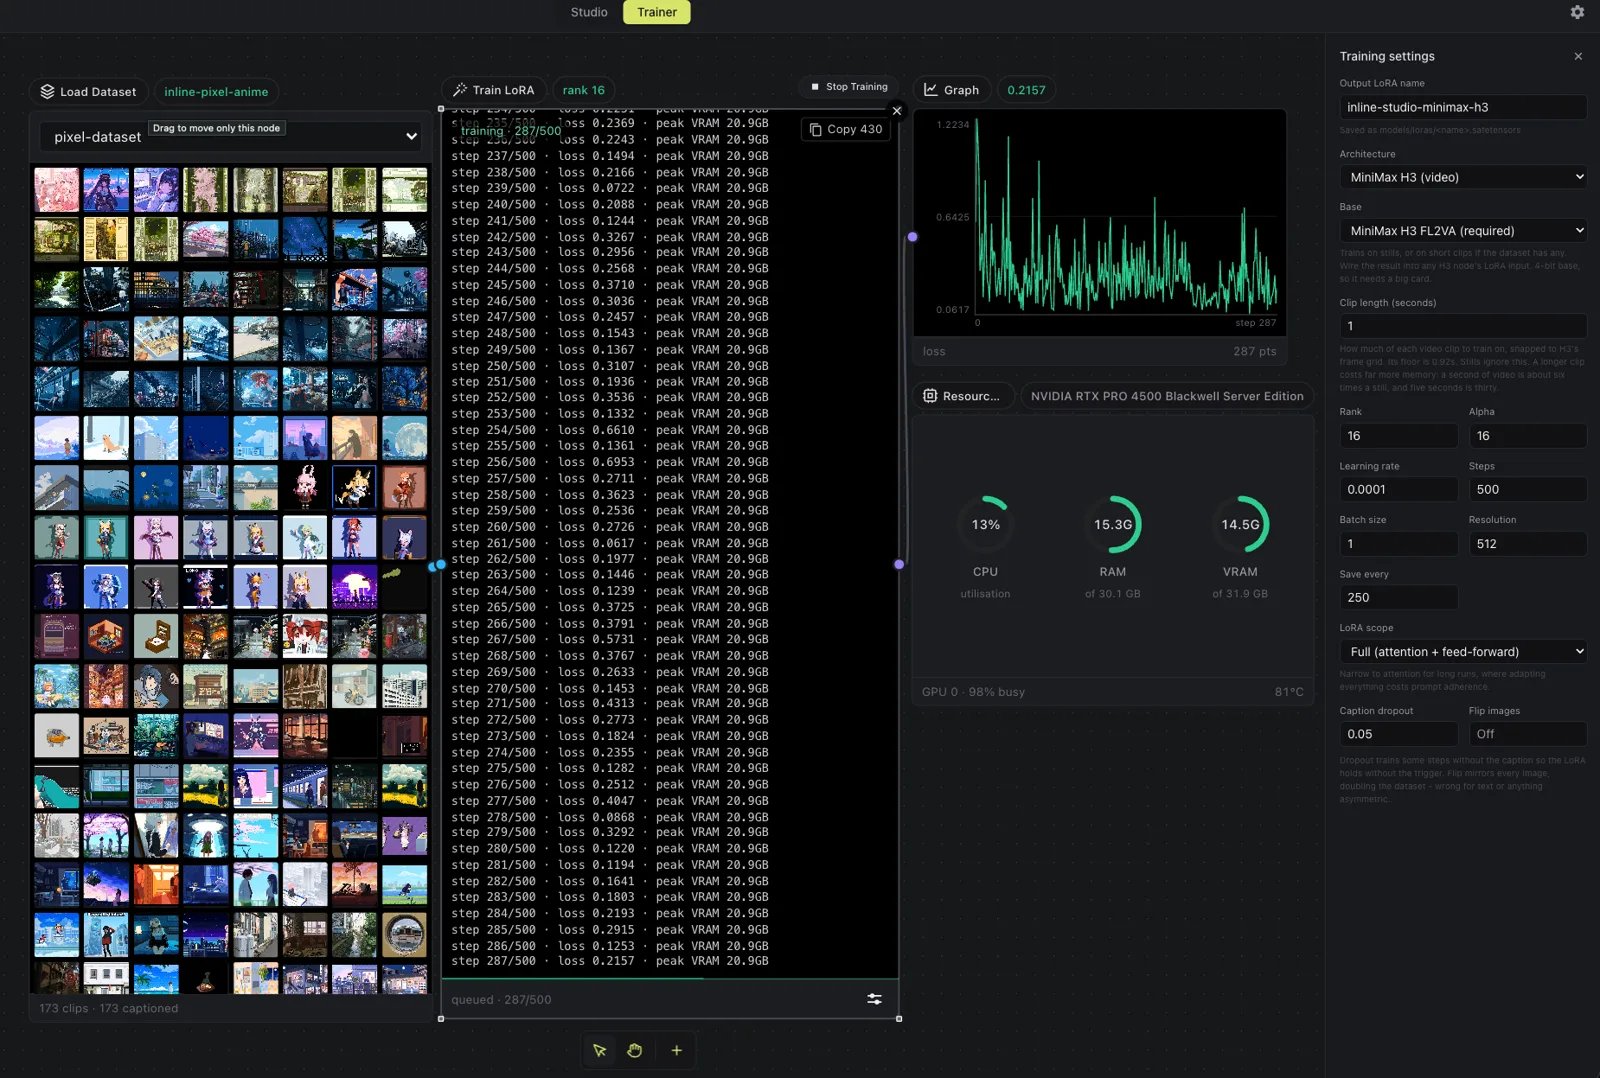
- Load Dataset feeds a dataset downstream. The node face shows thumbnails and counts; you edit images and captions in the side panel.
- Caption runs a local captioner over the images that need one. Captions stay editable afterwards.
- Train LoRA runs the job. Its face shows a live step counter, the streaming log and a progress bar. Hyperparameters live behind the Adjust button.
- Graph plots the loss curve of the run wired into it.
- Resources shows CPU, RAM and VRAM. It takes no connections.
Train your first LoRA
1
Build a dataset
On the Trainer tab, open Datasets, create a dataset, give it a trigger word and drag your images in. 20 to 50 images is a good range: a single character needs fewer, a broad style more.
2
Caption it
Run Auto-caption or write captions yourself. Start each one with a shared phrase, then describe the frame plainly. An uncaptioned image still trains, but against an empty prompt.
3
Pick a model and base
In Adjust, choose the architecture, then a base within it. Leave Base precision on Auto.
4
Start the run
Wire Load Dataset into Train LoRA and press Start. Watch the loss on the Graph node and VRAM on Resources.
5
Generate with it
The LoRA lands in
models/loras/. Add a LoRA loader node, put the trigger word at the front of your prompt, and generate.Recommended settings
If you hit an out-of-memory error, lower the resolution before changing anything else.
Trigger words
The dataset’s trigger word is prepended to every caption during training, so the model seesmytoken, a photo of .... Put the same token at the front of your prompt to pull the LoRA in. Match the phrasing of your captions too: if they all say “an oil painting of”, a prompt written the same way hits the trained style more reliably than the trigger word alone.
Dataset and adapter options
- LoRA scope. Full adapts the attention and feed-forward layers and is stronger on short style runs. Attention only suits long runs, where adapting everything starts to cost prompt adherence.
- Caption dropout (default 0.05) trains a fraction of steps against an empty caption, so the LoRA still works when a prompt doesn’t repeat the trigger word exactly.
- Flip images mirrors every image, doubling a small dataset. Leave it off for anything with text or a deliberate asymmetry.
Base precision
Base precision freezes the base model at 4-bit (NF4) while the LoRA itself trains at full precision, so only the frozen base loses fidelity.- Auto (default) sizes the base plus its activations at your resolution against your GPU, and picks.
- Full precision (bf16) forces the unquantized base.
- 4-bit (NF4) forces the quantized base.
Stop and resume
Stopping a run writes a checkpoint first, so Resume continues from the same step. A checkpoint holds the adapter weights, optimizer state, RNG state and step number. Runs cut short by a crash or a server restart show up under Outputs, ready to resume. Changing a setting in Adjust stages it behind an Update button. A checkpoint is tied to the rank, LoRA targets and base it was built with, so applying a change to a node with a resumable run asks first, then discards that run’s checkpoints. Finished LoRA files are never touched.A worked example
inlineresearch/skin-lora-krea-2-raw is a skin-texture LoRA trained in Omnichar Studio on Krea 2 RAW, from the 26 image and caption pairs published as inlineresearch/krea2-skin-lora.
The full benchmark matrix is in TRAINING.md.